Icon about-block-ico-1 Icon about-block-ico-2 Icon about-block-ico-3 Icon about-block-ico-4 Icon announcement-close Icon arrow-left Icon arrow-right Icon arrow-sm Icon asterisk Icon banner-transparent-vector Icon btn-callback-ico Icon careers-item-location Icon careers-item-time Icon careers-item-type Icon careers-mail-ico Icon careers-phone-ico Icon careers-search-ico Icon careers-single-hero-vector Icon careers-single-more-vector Icon careers-vector Icon check Icon close Icon dfm-image-left-vector Icon dfm-image-right-vector Icon document Icon download-popup-vector Icon dropdown Icon envelope Icon facebook Icon faq-banner-bg Icon faq-title-ico-active Icon faq-title-ico Icon featured-links-block-bg Icon figure-1 Icon figure-10 Icon figure-11 Icon figure-12 Icon figure-13 Icon figure-14 Icon figure-15 Icon figure-2 Icon figure-3 Icon figure-4 Icon figure-5 Icon figure-6 Icon figure-7 Icon figure-8 Icon figure-9 Icon file-upload Icon form-sidebar-back Icon form-step-done Icon gmap-marker-group-icon Icon gmap-marker-icon Icon header-profile-ico Icon instagram Icon link Icon linkedin Icon loader Icon mail Icon phone Icon play-yt Icon play Icon post-nav-arr-left Icon quote-banner-vector Icon quote-block-aside-vector Icon quote-contact-phone-ico Icon quote-contact-position-ico Icon sidebar-location Icon sidebar-phone Icon technology-banner-nav-left-vector Icon technology-banner-nav-right-vector Icon twitter Icon webinar-item-date-vector Icon whitepaper-img-ico-left Icon whitepaper-img-ico-right Icon whitepapers-listing-banner-ico Icon whitepapers-single-aside-vector Icon youtube Icon yt-play-button

7 Tips to Choose the Right Wheel Hub Assembly?

Choosing the right Wheel Hub Assembly is more than matching a part number. It affects steering control, braking stability, tire wear, and ABS performance. A small mistake can create noise, vibration, or dangerous sensor faults.

Automotive technician Larry Carley offers a useful rule: “Fitment is only the beginning; the hub must also carry the vehicle’s load and communicate with its sensors.” That principle deserves attention. Check the VIN, axle position, bearing design, bolt pattern, and ABS connector before ordering. A hub may look identical on a workshop bench, yet use a different encoder ring or flange offset.

This guide explains seven practical checks for selecting a dependable Wheel Hub Assembly. We will examine material quality, bearing sealing, sensor compatibility, load rating, installation requirements, warranty terms, and supplier credibility. Look closely at the old unit. Rust around the flange, uneven tire wear, or a humming sound during turns can reveal more than a product photograph.

Price still matters. It should not lead the decision.

A low-cost assembly may save money today, but repeated replacement costs more. Even experienced buyers can miss a connector shape or torque specification. That is worth admitting. Product descriptions are not always complete, and “direct fit” does not guarantee proper performance. Use verified measurements, trusted catalogs, and manufacturer instructions. The safest choice is the assembly that matches the vehicle precisely and survives real road conditions.
7 Tips to Choose the Right Wheel Hub Assembly?

Wheel Hub Assembly Basics and Key Selection Factors

Wheel Hub Assembly Basics and Key Selection Factors

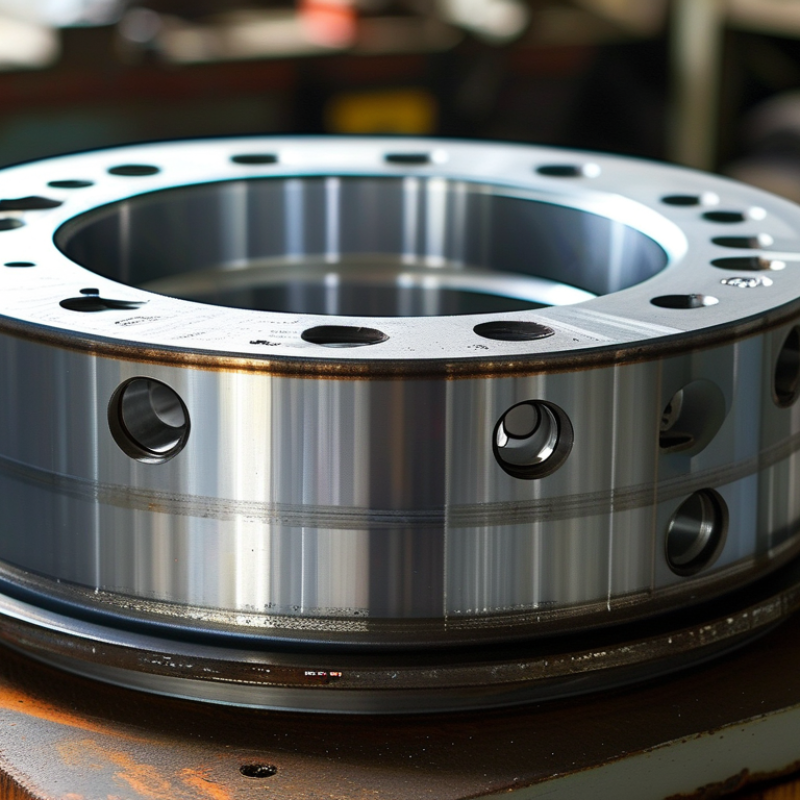
A wheel hub assembly connects the wheel to the suspension and supports smooth rotation. It usually includes a hub, bearing, mounting flange, wheel studs, and an ABS sensor ring. In daily driving, it faces road shocks, water, heat, and uneven loads. That combination makes accurate selection important. A quiet test drive does not always prove a bearing is healthy.

Tip 1: Confirm the exact vehicle fitment. Check the model year, drivetrain, axle position, bolt pattern, bearing dimensions, and sensor connector. Small differences can cause poor alignment or warning lights. I once assumed similar vehicle versions used identical hubs. That assumption was wrong. Verify measurements with reliable catalog data and the original part.

Tip 2: Match the assembly to real driving conditions. Heavy loads, rough roads, and frequent towing demand strong materials and effective seals. Look for controlled bearing clearance, corrosion-resistant surfaces, and consistent machining. Tip 3: Inspect installation details before purchase. The flange should sit flat, studs should be undamaged, and the ABS signal should match the vehicle system. Do not ignore torque requirements. Over-tightening can damage the bearing; under-tightening can create dangerous movement. Quality testing matters, but installation still depends on careful workmanship and accurate tools.

7 Tips to Choose the Right Wheel Hub Assembly

Wheel Hub Assembly Basics and Key Selection Factors

The chart presents a normalized engineering priority index from 0 to 100. Vehicle compatibility, correct bearing and load specifications, ABS sensor compatibility, dimensional accuracy, sealing quality, material durability, and warranty documentation should all be verified before selecting a wheel hub assembly. Safety-critical fitment and sensor requirements receive the highest priority.

Identify the Correct Vehicle Fitment and Hub Specifications

7 Tips to Choose the Right Wheel Hub Assembly?

Identify the Correct Vehicle Fitment and Hub Specifications

Choosing a wheel hub assembly starts with exact vehicle identification. Check the year, make, model, engine, and drivetrain. A vehicle with all-wheel drive may use a different hub than a front-wheel-drive version. Confirm the VIN when catalog information conflicts. It is a small step, but it prevents expensive returns.

Compare the axle position, ABS compatibility, bolt pattern, hub bore, flange shape, and spline count. Measure the bolt circle if records seem uncertain. Also check the bearing design and mounting-hole spacing. The replacement must match the vehicle’s load requirements, not just its appearance. I once trusted a similar-looking flange and missed a slight spline difference. That shortcut was careless.

Read the manufacturer’s specification sheet and compare every measurement with the removed part. Look for sensor provisions, connector orientation, and correct wheel-stud dimensions. Inspect the old assembly for corrosion or impact damage before using it as a guide. A damaged part can mislead you. Follow the vehicle service manual for torque values and installation steps. Never assume one torque setting fits every application. When fitment remains unclear, ask a qualified technician to verify the axle and hub data.

Evaluate Bearing Quality, Materials, and Manufacturing Standards

Choosing the right wheel hub assembly requires more than matching dimensions. Bearing quality affects noise, heat, steering stability, and service life. Look for precision-ground raceways, consistent preload, and seals that resist water and road grit. A bearing may feel smooth by hand yet fail under repeated loads.

Tip 1: Check the material specification. Heat-treated bearing steel usually offers dependable fatigue resistance. The hub body should also resist distortion under braking and cornering forces. Avoid vague descriptions such as “premium metal” without measurable details. Clear documentation matters.

Tip 2: Review manufacturing standards. Reliable assemblies should follow controlled processes for machining, heat treatment, lubrication, and final inspection. Ask whether runout, hardness, and torque settings are tested. Traceable inspection records provide stronger evidence than attractive packaging. Small errors become expensive later.

In workshop inspections, I have seen a hub pass a visual check but produce vibration after installation. The cause was slight flange runout, not obvious damage. That experience changed how I evaluate parts. I now compare measured tolerances with vehicle requirements and inspect the ABS sensor area carefully. Manufacturing consistency is essential, especially where wheel speed signals depend on accurate positioning.

Tip 3: Consider the complete design. Good seals, properly protected sensors, and correctly specified fasteners support long-term reliability. Installation instructions should state torque values and inspection procedures. Even a high-quality bearing can be damaged by improper pressing. This part is often overlooked. Be critical, and verify the evidence before buying.

Compare Seals, Sensors, Warranty, and Total Product Value

7 Tips to Choose the Right Wheel Hub Assembly

From workshop inspections, I have learned that a low price rarely shows the full product value. Start by checking exact fitment, bearing dimensions, and mounting surfaces. A hub should match the vehicle’s load, speed, and braking requirements. Confirm the seal design as well. A strong seal keeps water, dust, and road salt away from the bearing.

Inspect the ABS sensor and encoder ring carefully. The sensor should produce a stable signal after installation. Check connector quality, wire protection, and sensor clearance near the tone ring. Small errors can trigger warning lights or unstable braking data. Do not ignore installation torque. Incorrect torque may damage the bearing, even when the assembly looks perfect. I once focused too much on the bearing and missed a cracked connector. That mistake was avoidable.

Compare warranty terms, not just warranty length. Look for coverage limits, proof-of-installation requirements, and procedures for premature noise or play. A longer warranty means little if labor costs are excluded. Consider total product value through service life, including installation time, replacement risk, fuel efficiency, and vehicle downtime. Ask whether testing records and technical support are available. No checklist is perfect. A careful comparison still gives better evidence than a rushed purchase.

Verify Installation Requirements and Final Compatibility

Tip 1: Read the exact installation requirements before ordering. Confirm the vehicle year, model, drivetrain, axle position, and brake configuration. Wheel hub assemblies can look identical but use different sensors or mounting patterns.

Tip 2: Compare the original part with the replacement. Check bolt spacing, flange depth, spline count, connector shape, and bearing preload. A measuring caliper helps.

Tip 3: Follow the service manual’s torque sequence and specifications. Do not estimate torque by feel. The wrong value can damage threads or shorten bearing life.

Tip 4: Inspect the knuckle and axle before installation. Remove rust from contact surfaces, but do not grind away metal. A clean, flat mounting face prevents misalignment.

The Auto Care Association’s 2024 Factbook reports that the average U.S. light-duty vehicle is 12.6 years old. Older vehicles often have corrosion, previous repairs, or modified wiring.

Tip 5: Verify sensor compatibility with the vehicle’s anti-lock braking system. Check connector polarity, cable routing, and sensor clearance near the tone ring. Small differences matter.

Tip 6: Confirm wheel offset, stud size, and brake clearance after installation. Final compatibility includes the complete wheel-end system, not only the hub.

Tip 7: Perform a careful final check. Spin the hub by hand, inspect for play, and compare sensor readings during a controlled road test. I still recheck everything. Paper compatibility is not enough. An assembly may fit physically yet fail electronically. Record the part number, torque values, and test results for reliable future service.

MSIRobot